Delete a Virtual Server
In order to delete a Cloud server, you first need to access its page in HostDime's Cloud Portal.
Access the Virtual Server's Main Page
This is how you access your Cloud server's main page in HostDime's Cloud.
-
Log into your CORE account and click Cloud under the Products menu.

-
Click the Login to Cloud Portal button.

-
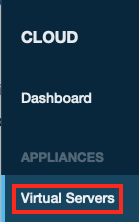
Now you will be on our Cloud dashboard page. Click on the Virtual Servers item in the sidebar to switch to a view of your virtual servers.

-
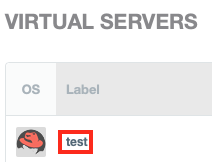
You will see a list of all of the virtual servers you've created. Click on the Label for the server you want to work with.

-
This will take you to a page where you can see up-to-the-minute statistics and work with your virtual server.
Delete the Virtual Server
To delete the virtual server follow these steps:
Once a virtual server is removed, it can't be restored unless you have a backup stored in our Cloud.
-
Select the Tools button near the top of the screen.
-
A number of different options will appear in a drop-down below the Tools button. Near the bottom, select Delete virtual server.

-
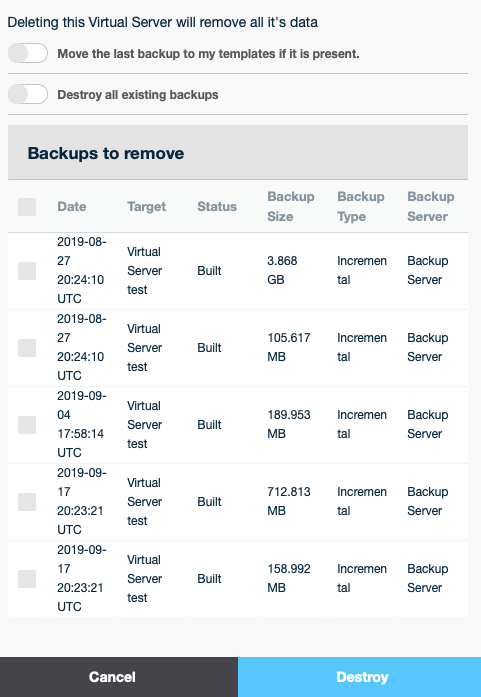
A new box will appear. If you have saved backups for this virtual server, you will be asked what you want to do with the backups (the default is to delete all of the backups along with the virtual server itself). You can choose to turn the most recent backup into a template so you can deploy a new virtual server based on that backup in the future or you can choose to only remove certain backups (or none at all). Click Destroy and confirm to schedule deletion of the virtual server.

-
You will be taken back to the main virtual server screen where you can wait for the machine to be destroyed.
Congratulations, you've deleted a Cloud server in HostDime's Cloud!